Gear Up: Podcast Equipment Essentials
Are you a budding podcaster, ready to dive headfirst into the thrilling world of audio storytelling? Hold on tight because we’re about to equip you with everything you need to set up your very own podcast studio. We’ll guide you through the podcasting wonderland, from the must-have gear to essential editing software and services. So, let’s get started!
Podcasting Equipment and Services
To start a podcast, you’ll need:
- A good-quality microphone,
- A pair of headphones,
- A computer or a mobile device,
- Recording and editing software to capture and refine your episodes
- A reliable internet connection,
- And a hosting platform to share your podcast with the world.
There are different types of podcast setups that you can use to start a podcast. You can start with a basic podcast setup, and upgrade as you advance in podcasting with additional features and services. Here’s a podcast starter kit according to the level of expertise, from basic to advanced and professional:
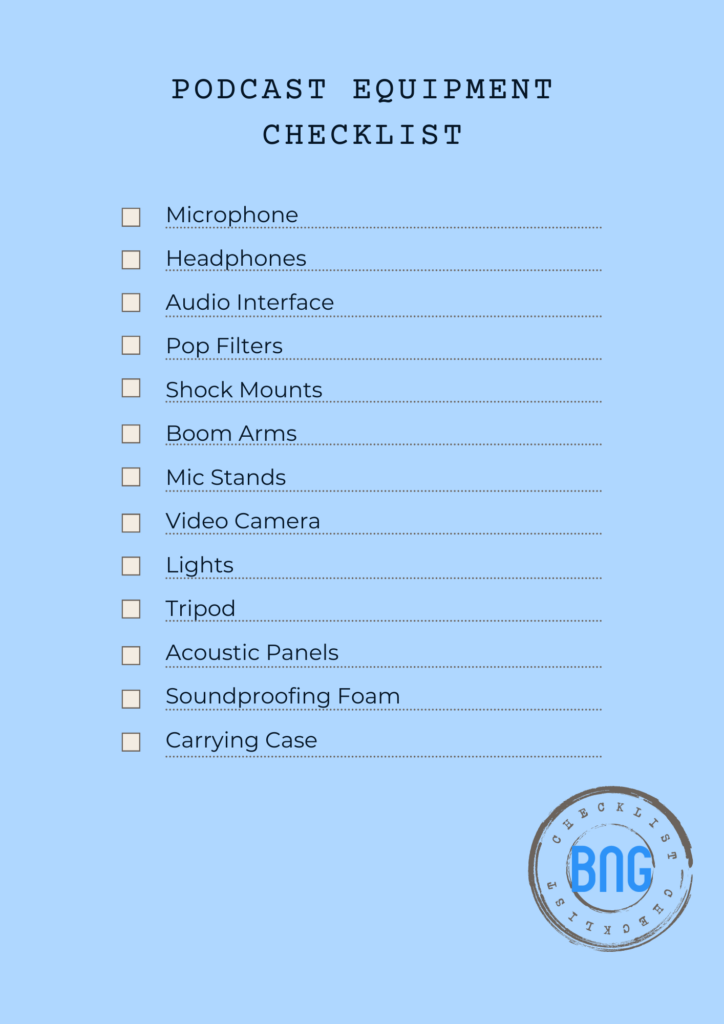
Basic Podcast Equipment
Microphones
Microphones are the magical gateway to your audience’s ears. When it comes to microphones, you want to buy the ones that provide excellent sound quality. You will come across many microphone names which you may find confusing.
These include dynamic microphones, condenser microphones, and xlr microphones. You will also come across other terms like a USB microphone (and a few others). And before you get too confused, we will explain what’s needed for a great podcasting start.
- Dynamic microphones are great in loud settings, usually used by bands. We don’t recommend getting this type of microphone for your podcast, but they are the cheapest option.
- A condenser microphone, which is sensitive, accurate, and more expensive, is much better if you want high-quality audio.
- You will also have the option to choose between an XLR mic and a USB mic. The difference is that a USB microphone is connected directly into your computer, while an XLR microphone needs an external recording interface. Both are good microphones, but the XLR allows more audio customization.
Price range for basic microphones: Around $50 to $350
Headphones
A good pair of headphones is an indispensable tool for any podcaster. They allow you to monitor your audio in real-time and catch any background noise, echo, or glitches. Look for closed-back headphones, as they provide better isolation from external noise and prevent sound leakage into your microphone.
Price range for basic headphones = $20 to $150
Audio Interface
This bridges the gap between your microphone and computer. An audio interface converts analog signals from your microphone into digital audio that your computer can understand.
Price range for a basis kit = Around $200
Advanced Podcast Equipment
Pop Filters and Shock Mounts
Say goodbye to plosive pops (that’s the strange sounds that our lips and tongues sometimes make) and unwanted vibrations. A pop filter is a screen placed in front of the microphone to reduce the “p” and “b” sounds that can create distortion. On the other hand, a shock mount suspends your microphone, isolating it from vibrations and handling noise. These accessories are small investments that can significantly improve your audio quality.
Boom Arms and MIC Stands
Give your microphone wings with a boom arm or a mic stand. These handy tools hold your microphone at the perfect height and angle, allowing you to comfortably record your voice without straining your neck.
Video recording equipment
If you want to up your podcast game, you could also record the visuals for your podcast. Using a compact camera at the beginning and a few lights (such as a backlight, key light, and fill light) will do the trick. You can later put everything together in a program such as Adobe Premiere or DaVinci Resolve. And voila you have the perfect setup for a YouTube video podcast.
Price range for an advanced kit = Starting from around $850
Professional Podcast Equipment
Pop-up Studio
A portable pop-up studio can be a lifesaver when you’re on the go. These handy kits typically include acoustic panels, soundproofing foam, and a carrying case. They help minimize echo and background noise, ensuring your recordings are clean and professional wherever you are.
Price range for a professional kit = Starting from around $1100
Podcast Equipment Example and Costs
Here are our podcast equipment suggestions:
| Podcast Equipment | Suggestions | Benefit | Price |
|---|---|---|---|
| Podcast microphone | Blue Yeti | Small, great sound quality and great price | $59,99 |
| NanoShure MV7 USB Mic | Produces rich, warm and high quality sound | $249 | |
| Headphones | JBL Quantum 100 | Great audio quality for a low price | $36 |
| Rode NTH-100 | Deliver an accurate frequency response, excellent for noise cancellation | $144,99 | |
| Audio Interface | PreSonus AudioBox | Improves audio quality | From $89 |
| Focusrite Scarlett | An easy switch to XLR microphones | From $99 | |
| Pop filters | LILALIWA 6 Inch Dual Layered Pop Windscreen | Gets rid of unnecessary noises | $9,99 |
| Shock mounts | Boseen Universal Microphone Shock Mount | Provides isolation from external vibrations | $12 |
| Rode PSM-1 | Offers effective isolation from external vibrations | $39 | |
| Boom arms and mic stands | Rode PSA1 Swivel Mount Studio Microphone Boom Arm | Helps position your microphone to where it needs to be | $99 |
| Heil Sound PL-2T Overhead Broadcast Boom | Optimizes the placement of your microphone | $109 | |
| Video camera | Sony ZV-1F | Vlogging style camera, good for beginners | From $500 |
| Sony a6400 | More advanced vlogging style camera | From $900 |
With all this talk of costs, you might be asking yourself how much do podcasts make anyway? Read our guide to learn how much you could make as a podcaster.
MORE: How to make money from a podcast
Podcast Editing Software
Now that you have the gear to capture your golden voice, it’s time to polish it into podcasting perfection. Another name for podcast editing software that you may be aware of is a digital audio workstation (or DAW). The good news is that you don’t need to spend money for a good DAW, the right recording software doesn’t have to be expensive.
Here’s a list of popular podcast recording software:
| Software | Description and Benefits | Price |
|---|---|---|
| Audacity | If you’re just starting, Audacity is a free and user-friendly audio editing software that packs a punch. It offers basic editing capabilities, including cutting, copying, and pasting audio, adding effects and adjusting levels. | Free |
| Adobe Audition | You might want to step up your editing game as your podcasting journey evolves. Adobe Audition is a powerful tool that provides a more professional and comprehensive editing experience. In addition, it offers advanced features such as multitrack editing, noise reduction, and audio restoration. | $20.99/mo |
| GarageBand | If you’re an Apple user, GarageBand is a good option. It comes pre-installed on Mac computers and offers a user-friendly interface with many editing tools. As a result, GarageBand is perfect for beginners and podcasters who want a straightforward editing experience. | Free (only for Apple) |
MORE: 25 great podcast topics
Watch our handy video to learn more about podcast equipement.
How to Set Up a Podcast Studio
Now that we’ve determined the necessary equipment, let’s list out how to set up a podcast studio in five simple steps:
Step 1: Choose the Right Location
Selecting the right location for your podcast studio is crucial. Consider a quiet area with minimal ambient noise and distractions. If possible, choose a room with carpeting or add rugs to reduce echo and reverberations.
Step 2: Soundproofing and Acoustic Treatment
To record higher quality audio, you’ll need to minimize ambient noise and control the acoustics of your recording space. Here are some tips for soundproofing and acoustic treatment:
- Add acoustic panels or foam: Place sound-absorbing materials on the walls to minimize reflections and echoes. You can find affordable foam panels or even make your own using materials like rockwool or fiberglass insulation.
- Seal windows and doors: Use weatherstripping or draft stoppers to seal any gaps that may let unwanted noise in or sound out.
- Consider a reflection filter: If you’re using a condenser microphone, a reflection filter can help reduce room reflections and improve the quality of your recordings.
Step 3: Set Up Your Equipment
Now that you’ve prepared the space, it’s time to set up your podcasting equipment. Follow these steps:
- Position your microphone: Mount your microphone on a boom arm or a microphone stand, adjusting the height and angle to suit your comfort and recording needs. Place the microphone at a distance where you achieve a clear and balanced sound.
- Connect your microphone to the audio interface: Use an XLR cable to connect your microphone to the audio interface. Ensure a secure connection and adjust the gain on the interface to set the optimal recording level.
- Connect the audio interface to your computer: Use a USB cable or the appropriate connection method to link your audio interface to your computer. This allows you to record and monitor your audio using podcasting software.
- Plug in your headphones: Connect your headphones to the audio interface or your computer’s headphone jack. This enables you to monitor your recordings and make real-time adjustments.
Step 4: Test and Adjust
Before you start recording your podcast episodes, it’s essential to test your equipment and make any necessary adjustments. Follow these steps:
- Check your audio levels: Open your podcasting software and monitor the input levels to ensure your microphone captures sound properly. Adjust the gain on your audio interface if needed.
- Listen for background noise: Put on your headphones and listen for any unwanted background noise, hiss, or hum. Troubleshoot by adjusting microphone placement, gain settings, or adding additional soundproofing.
- Test your voice: Record a short sample to evaluate the sound quality of your voice. Listen back to check for any volume, clarity, or distortion issues. Make adjustments as necessary.
Step 5: Create a Comfortable Environment
Finally, create a comfortable environment that promotes creativity and focus. Consider these elements:
- Ergonomic setup: Arrange your desk, chair, and equipment in a way that supports good posture and reduces strain during long recording sessions.
- Lighting: Ensure sufficient lighting in your podcast studio to create a pleasant and inviting atmosphere. Natural light is ideal, but if that’s not possible, use soft, diffused artificial lighting.
- Decor and personal touches: Add personal touches to your podcasting space, such as artwork, plants, or inspirational quotes, to create a space that reflects your style and personality.
MORE: Tips for writing a podcast script
Takeaway Points
With our podcast guide, getting essential podcast gear is going to be a breeze. So, what’s the first step to take? We recommend you head to our free podcast name generator and pick the perfect podcast name. Afterwards, this article can act as your step by step guide to getting the ideal gear for your podcast.
Remember about all the necessary equipment such as a microphone, headphones, and audio interface. As you get more advanced you can invest in additional bits and pieces such as pop filters, shock mounts and potentially a pop-up studio to take with you on the go.
What else should you take away from this article? Setting up a podcast studio requires careful consideration of location, soundproofing, and equipment placement. You can create an environment that enhances your podcast by choosing a suitable space, soundproofing effectively, and organizing your equipment correctly.
Remember that the best podcast equipment is, most of all, the one that feels good to you. So follow the recommendations, but stay comfortable in the process.